3 Simple steps to Reindex Social Communities

Hello everyone!

This is my first post in 2012 but it will sadly.. to be my last post of the OpenText Web Solutions Product. I will soon become the newbie in the Content Server space, yes still in the OpenText space so watch out I am coming!

Here I want to quickly document how to configure Search Engine Settings using Vignette Collaboration , especially for those ones like me came from the old RedDot and LiveServer world, the admin console seems pretty …. complex!

Just a few steps, I am sure you will find them easy to follow.

Step 1

Log into Social Communities / Vignette Collaboration and browse to the Main Page. The URL is by default http://<ServerName&gt;:8007

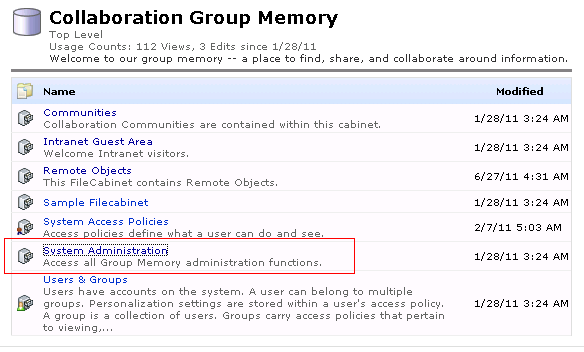
Collaboration Group Memory Screenshot

Click on the “System Administration” link

System Administration Screenshot

Click on the “Administration Console” link

Vignette Collaboration Administration Screenshot

Click on any of the “Services” links

Services Screenshot

Her you see a list of Services and one of them is the “Search Service”. Click on that and you will see the screen below

Search Services Screenshot

Step2

Now we are in the right place to kick off some actions. Before you go ahead of kick of the Reindexing action, let’s click on the “Search Engine Information” link down the bottom of this page. You will see something like this

Search Engine Info Screenshot

Step 3

Once we are all happy with the config and ready to reindex, you have two options here. If you know the  Remote Object ID of the content you’d like to reindex, you can just  do the “Manual Object Indexing”; if you are unsure and would like to reindex all the objects, there is also an option for that which is “Data Based Indexing”.

Social Communities uses  Common Search so you can start monitoring the log files and hopefully that just worked for you!
Best Approach for Managing CSS and JS

What is the best approach while implementing the content structure?

Should CSS and JS be removed from a project and kept separate from content?

Have developers and designers ever fought over how the files should be accessed?

Should files be stored and managed by IIS or CMS? Have you ever wondered how to make everyone happy?

Thanks to Graeme Heath, the Web Designer/Info Architect with 5+ years experience working with the content structure in CMS, here is the summary of our “best practice approach” in delivering site structure which we think is the best for now.


Over the last 2 years a lot of talk has focused on getting CSS and JS files out of a Management Server project and putting them into a separate publication target or website. The two main approaches were either linking the CSS and JS resources into to hard linked locations created by clever project variants/publication packages. The other method was to keep all the CSS/JS files in an external site and just link to them. (The first method was demonstrated in the Best Practice project that came with MS v10).

One of the many ways to achieve LDAP SSO using Delivery Server 10.1

Have you ever tried to Single Sign-On LDAP users into Delivery Server projects? Last week I was looking for a quick and easy method, with special assistance from Tim Davis (and thank you!), here I am documenting the steps to achieve this.

My solution can be explained in the simple diagram below:

Solution Architecture

As you can read from the diagram, I am using .NET to read the user name, format my own digest string, and then include hash value as one of the request parameters in the URL before getting redirected to Delivery Server by ISAPI. Once the request has traveled to Delivery Server, I can then use the username provided in the URL, compute and compare the hash values; if the hash values match then I can use dynament code to login the user automatically using the trusted mode.

Step 1 – writing  .NET code
This one is easy, very straight forward; a few variables, one function, one redirect.

FUNCTION_PAGELOAD

At the end of the Page_Load, I redirect the user request to a virtual directory I made up with the same name as the Delivery Server project name (just to make the URL user friendly).

Read more of this post

Troubleshooting Common Search with Delivery Server [Best Practice Project]

I went through the post blogged by Danny Baggs over and over again for about more than 10 times while setting up my Common Search server but it was just not working! There is nothing more frustrating than having the search working in Livelink but not in Delivery Server. I am new to the whole LiveLink interface thing and that didn’t help me either. If you are on the same boat and are having similar issues, I hope this post will assist a little.

From reading Danny’s post, we all know that we need to set up a shared folder and a Delivery Server connector to communicate with Common Search server. Here is the summary of what I’ve concluded after my 3 day’s tough time in regarding to how the integration works.

Delivery Server creates xml files which contain all the information about pages and project content, those files are stored under the shared folder for the Common Search Server to process; therefore, both servers need permission to write and read contents in this shared folder. The Common Search Server then indexes the files created by Delivery Server, creates a collection and sets up a search scope for each project . When a search query is performed, Delivery Server sends a request to the Common Search Server, the search query gets executed, and returned to the Delivery Server Server in the XML file format.

Easy, yeah?

So, here we set up the Delivery Server Connector, and I want to use my own Common Search user but not the Admin Account.

First tip, make sure the user has the “System Administration Rights“. This can be configured in the Common Search Interface. Read more of this post

Installing Web Compliance Manager with Management Server (RedDot)

Web Compliance Manager is a separate module can be purchased to ensure that your web site meets corporate compliance without spelling errors. More marketing information can be found here .

This is a really simple install, and I am sure there are many people out there have implemented this without issues. I am documenting this more for my own benefits, so I don’t have to scratch my head again when doing the installs.

This time I will be installing a Pre Version, as you are probably aware, there are two versions “PRE” and “POST” for WCM. The “PRE” version checks the pages before they are published, while the “POST” version checks against the already published pages/sites. In this example, I will be using the PRE version, and will be installing on the Management (RedDot CMS) Server 10.1 using the Tomcat Server as the server engine.

Firstly, you need to get a license; (as always…) and secondly, you need to download the required software from the Knowledge Center.

Step 3

Decide the server engine you are going to use, and get the prerequisites installed. For example, here I need Java and Tomcat. The Installation files are structured very neatly which also comes with software required for prerequisites.

Step 4

Deploy the wcm.war file. Read more of this post

SeeUnity’s DM Integration for SharePoint – Overview

Recently I got my hands on some of the SeeUnity’s powerful Integration Components. SeeUnity has two components designed for SharePoint, the Enterprise Integration and the Archiving and Distribution Services. The first one allows users to access or push eDocs documents via the common SharePoint Interface, and the later one allows documents to be synchronized or  linked (manually or automatically) between SharePoint and external repositories based on customized rules and field mappings.

There are many functionalities provided by these two components, but doesn’t matter how many you are configuring, there are two things need to be understood before getting your hands dirty.

  1. Understand the number of applications required to be installed and
  2. Decide where they should be installed.

It sounds easy, but for me this was the most difficult part. In most environment, there are at least 2 servers involved (given that the chance of having both the SharePoint Server and DM Server on the same box is extremely low); the DM server and the SharePoint Server. To make it even more complicated, some of the components can even be installed on a dedicated SeeUnity Server for performance optimization.

The SeeUnity’s documentations are fairly well documented, but not all the scenarios can be covered; and the fact that it is so flexible, it does add some complexity to the installation process.

The core applications for the integration are:

  • Core Integration Services

Read more of this post

OpenText Social Communities Installation + Integration with MS SSO

I have to say, I struggled with this for a good few weeks. Since the Delivery Server 10.1 is out with the Social Communities included, we have been asked many times to demonstrate it to our clients. Potentially, huge money there. However, the support to get this up and working is very limited.

I will try and make this really short, so that I don’t bore you to death.

Step 1

As always, make sure you have the required licenses, assuming you already have a working instance of Delivery Server 10.1. There are three modules that you will need, which are

  • HTRE – HTTP REST Connector
  • PCON – Portlet Connector
  • PRDW – Interface to JSR 168 and IBM WebSphere portlets

The OpenText licensing department seems pretty efficient in issuing/renewing licenses these days, which is good to see.

If you can’t get those required licenses, you will not be able to continue.

Step 2

You will need to install Common Search which now comes free with the Delivery Server.  (Make sure you have the license key too) You will need to do this before installing the Collaboration Server.

Step 3

We now need a Collaboration Server. Collaboration Server can be downloaded from the OpenText Knowledge Center along with the installation manual. You will need to follow the instructions carefully, as well as setting up the correct permissions for the indexing folder/s.

A successful install should get you the screens like below.

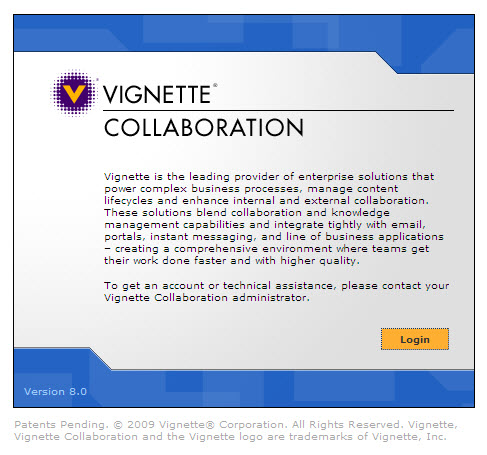
Collaboration Login Screen
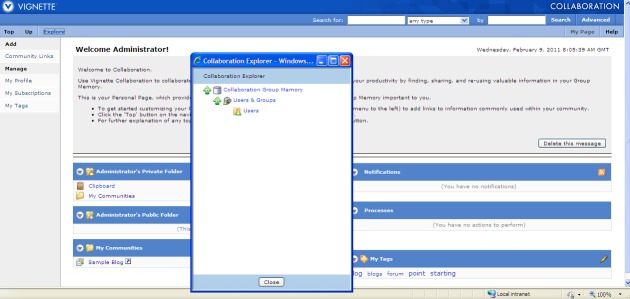
Collaboration Interface Screen

Step 4 Read more of this post

Who said RedDot CMS is going away? OpenText MS 10.1 will convince you!

A lot of people are scared that RedDot OpenText Management Server might be going away since being acquired by OpenText a few years ago; it doesn’t  seem to be the case by looking at the number of versions released after that! I recently installed the most recent version of RedDot OpenText Management Server 10.1 and it definitely has impressed me in many ways.

Best Practice

First of all, the new Best Practice sample project is heaps better than the up-and-away project. It does take a while to set it up but once it is set up everything you need is all documented there!

For those people who are experiencing difficulties getting it up and running Read more of this post

eDocs/HummingBird and CMS Integration

Many people asked me about the integration between OpenText eDocs (former Hummingbird) and OpenText MS (former RedDot). This is going to be an ongoing post, since the area is too large to include every detail in a post. I will just try my best here, but please bear in mind that every environment is different and do not expect the integration to work the first time after your install!

First of all, you have to ensure that you obtain the correct version of the integration piece for your environment. Here is the compatibility matrix, the version I have been working with is eDocs v6 and CMS 7.5, CMS 9, CMS 10.1.

eDocs CMS Compatibility Matrix

Got the right version? Now we can start. Read more of this post